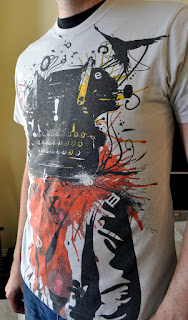
 |
| Before |
 |
| After |
Sewing T-shirts into pillow requires pretty basic sewing skills - it's mostly straight lines - and requires basic sewing supplies.
Shopping List
- 14" pillow forms
- Fusible iron-on interfacing (sheer weight)
- 7-10" zippers
 |
| Each shirt had a small caption in the lower left back |
We cut a 15" cardboard square to serve as a template (14" + 1" for a 1/2" seam allowance) and used that to select the best graphics for the shirt.
We really liked how each shirt has a title to the artwork - it's part of the character we wanted to preserve. Here, you can see I saved the label from the back of the shirts to include as the back of the pillow.
 |
| Iron fusible interfacing bolsters wimpy T-shirt fabric |
We then ironed on interfacing to the inside of both pieces of fabric. This gives the thin jersey knit of a T-shirt a bit more substance, and helps limit the stretching that we love about T-shirts as clothing - which makes sewing this fabric a lot easier. If you skip the interfacing step your pillow is likely to end up lumpy or misshapen and you'll need to use a knit stitch to allow for some stretching that will otherwise break straight basic seams.
 |
| Rotary cutters rock! |
We found it necessary to trim again before sewing to get back to a 15" square, this time using the rotary cutter - one of my favorite sewing tools.
We place the two pieces of fabric (front & back) right-sides together. Then, drew a 14" square centered on the fabric to mark our sewing lines. We sewed the bottom first to accomodate the zipper, then sewed each side, followed by the top of the pillow. The order is important to accomodate for any stretch in the knit fabric that might distort your pillow shape.
We managed to whip up 3 this afternoon with great success! Now, if only finding new clothes was this easy...
No comments:
Post a Comment